Unity
TyTe Tile Level Editor
Intro
OK. The world is a bit of a crazy place right now (thanks CoronaVirus). And like many folks, my family has been seeing a lot of each other over the past few weeks, and likely months to come. While we are truly going through some strange times, our outlook is good. Let’s use this time together to make something positive. So that’s our plan.
One of the ideas that we have had for a bit now, but really haven’t had the time for, is to come up with a video game that the entire family can work on together. Guess what, we have the time now… so, what we’ve basically came up with is a top-down adventure-style game, where the goal is to basically help others and make your world a better place. So, my family all has different talents… my oldest daughter likes work on art, my youngest is more of a planner/layout specialist, and my wife likes to develop stories (I guess that leaves me with coding).
As I’m trying to pull together how we can all contribute, I figured that level editing a top-down world would be one of those areas. I also figured that we would work with javascript as the development language, as it’s pretty easy to use (you have a browser, right?) and it’s something that I’ve been actively trying to learn as part of my HomeTeam GameDev club work. Given those constraints, I started looking at free software that’s already out there that we could use. And there are quite a few options. Top of the list is Tiled. This is a full-featured, actively-maintained and looks to be very efficient level editor. It supports all kinds of features, different kinds of maps, and integrations into GameDev engines. And it’s basically free. It seems like if you take the time to learn how to use the tool, it would be a great editor. However, one of my goals for our family project is for folks to be able to jump right in and help, without too much of a learning curve, or having to figure out how to use a tool.
So, with the idea of keeping things simple, I thought it would be a good idea to write a level editor from scratch using Unity. Ya, that sounds like a good idea…
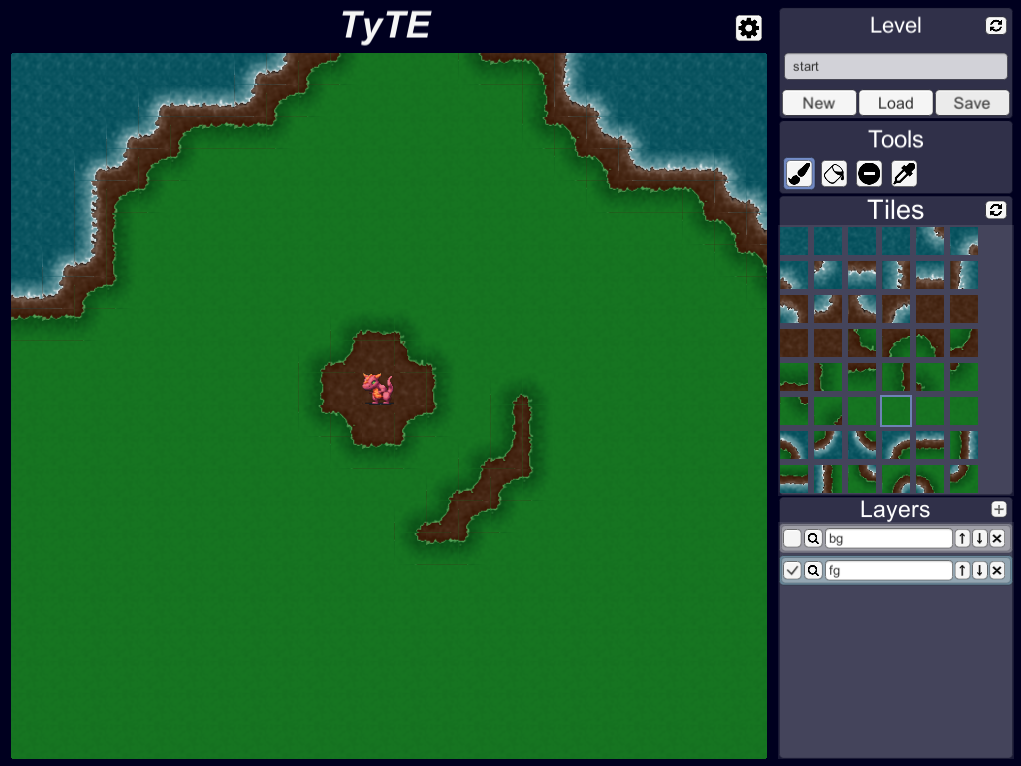
Design
One of the direct benefits of writing your own tool is that you can build it to meet your exact needs. So lots of fancy features like supporting different map types or engine integrations aren’t needed. I’m making my game in javascript and I’m using a top-down set of tiles. This limits the required feature set:
- Easy to use
- Needs to directly edit the game files used in my javascript project (more on this below).
- Support for multiple levels/zones
- Support for multiple layers of tiles within a zone (e.g.: background, foreground, etc).
- Basic editor functions, add tiles, flood fill, erase
- Portable (can run on Mac/Windows)
My gamefiles are laid like so:
projectdir
├── index.html
├── ...
└── src
    ├── img
    │   ├── 32grass.png
    │   ├── 32road.png
    │   ├── sprites.json
    ├── js
    │   ├── ...
    └── zones
        ├── start.json
        └── test.json
The important folders here are the img and zones folders. First off, the img folder contains all of the individual sprite files that I intend to use in my game. I know lots of games use sprite sheets instead of individual images for a number of reasons. Maybe I’ll get there at some point, but for right now, it is easier for me to manage them in separate files. Within this folder is also a sprites.json file which I maintain. This contains the mapping between a unique identifier for the sprite (just an integer), and the sprite file itself. The unique identifier will be used and referenced in the saved level data. For now, I just manually edit this json file when I need to add more sprites. The biggest reason for this is that besides data needed for the level editor, I intend to add data specific to the game (like collision info, terrain info, etc.). Next is the zones folder. This is where I intend to keep all of my level/zone definitions. A zone definition consists of information about the zone, like it’s name, it’s dimensions, and the list of layers for that zone. Each layer has a name and the actual grid of tiles that have been assigned to that layer, referenced by the unique sprite identifiers (it’s an array of integers :)).
My design approach for the editor was driven by getting something running as soon as possible. Probably the biggest issue with this approach is that I ended up using individual game objects to represent the tiles within the grid to edit. You can do the math… let’s say you have a new zone you want to create that is 50x50 in dimensions. Let’s also say you want to have a background, a foreground, and a separate object layer. You now have 50x50x3=ouch game objects running in unity while you edit this zone. Now, I’ve been editing zones with multiple layers as big as 100x100 on my laptop. There is a little lag, but it works (my laptop just gets warm). So, it fits within the constraint of getting something working up and running ASAP. I do want to go back and change out the grid managemnt using a single canvas. It’s on my to-do list along with a handful (err… maybe more than that) of other things.
The rest of the code is pretty straight-forward and I’m overall happy with how it’s working. I won’t bore you with further details. The code is there for you to view or drop me a line if you have questions/comments.
Usage
See my README file in the github project for the level editor for how to use the tool.
References
- TyTe on Github - The entire Unity project and all source code, with example levels/tile art.
- TyJsJam on Github - An example JS game framework utilizing the levels/tiles managed by the editor.
Thanks
- HomeTeam GameDev Folks - For support, inspiration, and bits and pieces of code from other JS games.
- Austin Blackwood @AABlackwood - For the dragon tile used in the referenced projects.
- Matiaan from OpenGameArt.Org - For the top-down tileset used in the example projects.
Tylor Allison GENERAL
gamedev, unity, javascript, utility